Thursday, February 28, 2013

New Online Class

Hello Stamping Friends,


Stampin’ Up’s new online Stamping class is now available!!! This class shares innovative ideas to get the most out of your supplies (from Stamps to Big Shot) including several tips and techniques!

 
This class is divided into six sections that are focused on a variety of topics. It will include videos, step outs and supply lists for 30+ projects!!

Do you want to know what the best part of all is? You get all of this, for only $14.95 and an extra bonus there is no shipping and handling!
Wouldn’t you love to have yours in just a matter of minutes? Well you can. Just enter the product code of #133385 for your Class today. Just click here to be directed to my online store and get yours today!
This is some pretty awesome news, don't you think? A class that you can view over and over, complete it on your own time and at your own pace all from the comfort of your home.  You can stay in your jammies and craft. Now I can't think of anything better than that.

Rain or Shine, I Think of You

Hello Stamping Friends,

Hope today friends you doing extremely well.  It is the last day of February and that means Spring is right around the corner. I know I can't wait: sun, warmer weather, trees growing their leaves, flowers blooming, birds chirping. Everything will suddenly come alive. It's just so energizing, isn't it?

Today I'm sharing a card with you that I made for a workshop a while back.  You  know that I needed to have the whale set and I think I'm doing a pretty good job of actually using the set, don't you?  I think it's a great set to pair with the oh, so cute umbrellas too.

 
I used the window frames framelits for my focal point. And to add a little twist to the look I didn't use them to layer, instead I just used square pieces of cardstock for my layers. Also, I like the pairing of this particular designer series paper because there are clouds and raindrops and then the sun shining and rainbows, perfect for the greeting on this card. Well, that's what I thought anyway.  I stamped the umbrella handle right on the window frame cutout instead of trying to cut it out. Much easier that way.
 
 I know I've been hearing lots of rumbles and grumbles when I have to have stampers cut out the umbrellas though. Everyone asks for a punch or framelits. Boy, we have become extremely spoiled, haven't we?
 
It looks like this card is more difficult to put together than it really is and I credit the designer paper for that. Makes it looks so nice without much effort at all.
 
Stamping Supplies Used:
Stamps: Rain or Shine & Oh, Whale
Ink: Pacific Point, Melon Mambo & Basic Gray
Paper: Whisper White, Pacific Point & Daffodil Delight Cardstock & Sunshine & Sprinkles Designer Series Paper
Accessories: Big Shot, Window Frames Framelits, Paper Snips, Dimensionals, & Snail Adhesive


Monday, February 25, 2013

More Dress Up Fun

Hello Stamping Friends,

Back again with another dress up fun pop up card.  Today, I'm back to my old ways, you get to see the front of the card before I show you the inside.  And to top it off you probably don't even care, do you?
 
The outside of this card is pretty easy without too much fuss thanks to some great designer paper. Although I stepped it up a bit by adding a nice dress form stand with a little ribbon and a greeting. Just gotta tell ya, I would love to receive a card like this, so I'm more than sure others (that you would be making cards for) would too.

 
And here's the inside. A pretty little everyday dress that you would wear to work. With a pretty string of pearls around the neck to accent.  Also, the flower trim rose is "tinted" with the midnight muse marker. To color the flowers, just use the brush side of the marker and color the top of the flower.  You can color your roses any color you want.  Seriously, if you haven't ordered some of the flower trim yet, you really need to. It's so great and it will go really far. Once you have them, you'll say to yourself, "Why didn't I get them sooner?"
 
Stamping Supplies Used:
Stamps: A Word for You
Ink: Midnight Muse
Paper: Very Vanilla, Midnight Muse, Gumball Green, & Crumb Cake Cardstock, Print Poetry Designer Series Paper Pack
Accessories: Big Shot, Pop n Cut Card Base Die, Dress Form Pop n Cut Die, Dress Up Framelits, Midnight Muse Stitched ribbon, Paper Snips, Dimensionals, Basic Pearls, Snail Adhesive, 5/8" Flower Trim, Glue Dots

Sunday, February 24, 2013

Time to Dress Up

Hello Stamping Friends,

I must say, I love, love, love the new dress up product suite in the Spring Catalog.  Brings me right back to childhood and playing with paper dolls.  I will be sharing more of these with you, you can be sure of that. There's so many fun dresses to make, I can play for hours.

Usually I show you the front of the card first but today I'm doing it a little it a little different. Hope you don't mind me switching things up a bit.

 
Let's face it, who doesn't love a pop up card?  What a fun surprise to open a card and have a fun little pop up to make you smile a little more.  I love the new flower trim too, it makes a perfect accent for these fun paper dresses.  A little ribbon around the wait with a flower to finish it off. Perfect, if you ask me! 
 
 
Here's the outside of the card.  This was such a simple card front to put together. It's mostly paper with just one little stamp embossed.  The Tea for Two designer series paper is so pretty.  Just about everyone I have shown this card to thought the flowers and background were stamped. Nope! It's just paper.  Pretty awesome, right?
 
Tomorrow I will share another card with you. So be sure to stop by again.
 
Stamping Supplies Used:
Stamps: Bring on the Cake
Ink: Versamark & Calypso Coral
Paper: Basic Black, Calypso Coral, Very Vanilla Cardstock & Tea for Two Designer Series Paper
Accessories: 3/8" Vanilla Taffeta Ribbon, 5/8" Flower Trim, Big Shot, Dress Up Framelits, Card Base Pop n Cuts Die, Dress Up Pop n Cuts Die, Heat Gun, Platinum Embossing Powder, Snail Adhesive, Glue Dots & Sticky Strip

Friday, February 22, 2013

More Sale-a-bration Going On

Hello Stamping Friends,

Welcome to another Fabulous Friday with Sisters in Stamping.  This week we needed to use the Sale-a-bration designer series paper, Sycamore Street on a project.  I made this card awhile ago but didn't share it so I figured I should do it now since it fits the challenge.

 
Funny thing, is I made it for my son Noah because he went skateboarding at an indoor skate park. About 10 minutes after I dropped him off, my phone starts ringing and it's him. He asks if I was anywhere new Walmart. I told him no, I'm halfway home. He continued to tell me that he really thinks I need to go to Walmart because he ripped his jeans. I asked how bad is it and can't he just wear them. He told me that they were pretty bad.  So Mom turns around and head to Walmart (which is only about 2 blocks away from the skating place. I told him I would just get some athletic type shorts (I really knew it was bad if he was asking to get no name jeans, he always wears skinny jeans from skating stores). When I went to drop off the shorts, I saw his ripped jeans. He was absolutely right there was no way he could stay there skating for 5 more hours. There's no way of fixing these jeans as the tear is about a foot long from the zipper down. I was frustrated that day but the next day I laughed about it and said he was like SpongeBob. (Guess that's on too much in this house).  So I made him this card, of course, he didn't appreciate nearly as much as I did. LOL
 
Hope you enjoyed the little story behind the card. Don't forget to head over to Sisters in Stamping for more ideas using the Sycamore Street designer paper from the Sale-a-bration flyer.
 
Stamping Supplies Used:
Stamps: Patterned Occasions (Sale-a-bration)
Ink: Pacific Point Classic Pad & Stampin' Write Marker
Paper: Pacific Point, Tangerine Tango, & Whisper White Cardstock, Sycamore Street Designer Series Paper (Sale-a-bration)
Accessories: Petite Curly Label Punch (Sale-a-bration), Snail Adhesive, Dimensionals


Thursday, February 21, 2013

Pretty Flowers for You

Hello Stamping Friends,

 I hope you are having a great week. Tomorrow's Friday, woohoo!  Today I'm sharing with you a card we made at the January big shot class.  It was a lot of fun to make and I love whenever you can use some stamping supplies outside the box and that's just what this card did. Continue reading to see what I'm talking about.
 
On the outside it looks like any ordinary pretty flower card, right?  Well, wait to see what happens when you open it up.
 
 
Ta da!!!!  It's the awesome new dress form die made into a cute pot full of pretty flowers. First of all, let me just say that I love, love, love the new pop up dress form die. But then knowing it can be used for other things and not just dresses is simply awesome.  I'll be sharing some more ideas with you as I make them. Don't want to spoil the fun just yet.

 
And here's a close-up of the flower pot "stand" and the pot of flowers.  What do you think? Pretty clever, huh?

Stamping Supplies Used:
Stamps: Raining Flowers & Trust God
Ink: Rich Razzleberry, Lucky Limeade, Tangerine Tango & Regal Rose
Paper: Rich Razzleberry, Crumb Cake, Basic Black, Cajun Craze, & Whisper White Cardstock, International Bazaar Designer Series Paper
Accessories: Big Shot, Card Base Pop n Cuts, Dress Form Pop n Cuts, Dress Up Framelits, Honeycomb Embossing folder, Snail Adhesive, Paper Snips, Dimensionals
 
Thanks for stopping by.
 Come back tomorrow for Fabulous Friday with Sisters in Stamping


Wednesday, February 20, 2013

Blowing Wishes Your Way

Hello Stamping Friends,

Dropping in quickly today to share a cute little project with you.  I love the new pinwheel sizzlet. It makes the cutest little pinwheels to adorn just about anything.  It die-cuts the pinwheel and even punches the holes in the end to put it together.  I love using our designer paper because it's double sided and makes for an adorable finished pinwheel.

 
I filled one of the long skinny cello bags with some gumballs and punched a few pieces of cardstock to make a fun topper for the bag of gumballs.

 
Here's the full length version. Cute, right?  I think these would be a great little gift or party favor.  I used the coordinating stamp set, Wishes your Way to stamp a little greeting to attach to the topper.
 
Stamping Supplies Used:
Stamps: Wishes Your Way
Ink: Pacific Point
Paper: Lucky Limeade, Pacific Point, Daffodil Delight & Whisper White Cardstock, Sunshine & Smiles Designer Series Paper
Accessories: Big Shot, Pinwheel Sizzlet, Silver Brad, Dimensional, Snail Adhesive, Decorative Label Punch, Wide Oval Punch, & Large Oval Punch, Paper Snips, 1"x6" cello bags


Tuesday, February 19, 2013

Make a Wish

Hello Stamping Friends,

I have another chalkboard card for you today.  Check out yesterday's posting for the details on how you do the chalkboard technique.  Today's card is a great birthday card for anyone, could even be for a guy. I know we don't always have masculine cards readily available but I really think this one would do the trick.

I love the banner hanging on an angle. It's so fun and festive and would be a great addition to any celebration.  On this one I used a white gel pen to frame off the chalkboard.


The Sunshine and Smiles designer paper pack is not only great to use with the whale and umbrella set in the Spring catalog but as you can see on this card, it's great to make a festive card for a birthday celebration. 

I hope you find this technique fun and want to try your own hand at making them.  Let me know if you have any questions, I'd be happy to help you.

Stamping Supplies Used:
Stamps: Word Play
Ink: Whisper White Craft Ink, Pacific Point, Daffodil Delight, Melon Mambo Classic Ink
Paper: Whisper White, Crumb Cake, Basic Black, Sunshine & Smiles Designer Series Paper
Accessories: White Embossing Powder, Heat Gun, White Gel Pen, Dimensionals, Hearts a Flutter Framelite, Tulip Frame Embossing Folder, Big Shot

Monday, February 18, 2013

You are my Sunshine, My Only Sunshine

Hello Stamping Friends,

It was a bright, beautifully sunny day here in NEPA.  The sun was out and bright much of the day, which made it a very enjoyable day (from inside that is because it was awfully cold outside despite the sun).  I thought this card was a perfect way to celebrate the day.

The "You are my Sunshine" stamp is a single stamp that you can purchase now through the end of March.  When I saw it I knew it was a stamp that I just needed to have.  I have a story to share (I've been doing that a lot lately, hope you don't mind).  I needed to have this stamp because when my Mom was pregnant with me she wanted to find a name that her family couldn't shorten. She said they shortened everyone's names and she wanted them to call me by my appropriate name.  So her and my Dad decided on Rachel.  She didn't see how they could shorten Rachel.  Well, lo and behold they found a way to shorten it, they started calling me Rae.  So to make things better she decided to go along with it and said Rae was okay because I was her "Rae" of sunshine.  Now you can see exactly why I "needed" to have this stamp. There's so many other great singles stamps, you're going to have to check them out HERE.

 
I love the chalkboard technique and thought this stamp would be a perfect stamp for the technique.  You stamp your image in white craft ink on black cardstock, emboss with white embossing powder and then when the embossing is cooled you smudge white craft ink across the cardstock using a stamping sponge. 
 
I also used a few images from the Every Little Bit set to finish off the look I wanted, doodling on a chalkboard.  After I embossed all the images I took a pink and a yellow permanent marker and colored over some of the white embossing so I can have "colored" chalk drawings.  I love how I finished it off with some "pieces" of chalk on the chalk holder at the bottom.  Very easy to do, just cut small scraps and the beauty is that they don't have to be the same or perfect, it's chalk, there's no perfect chalk once you start using it.
 
Stamping Supplies Used:
Stamps: Every Little Bit, Sunshine (single)
Ink: White Craft Ink
Paper: Silver, Daffodil Delight, Basic Black, Pretty in Pink & Whisper White Cardstock
Accessories: Tulip Frame embossing folder, big shot, white embossing powder, heat gun, snail adhesive, stamping sponges, Permanent Markers (non Stampin' Up)
 
Thanks for stopping by. Come back soon.

Sunday, February 17, 2013

Hello?

Hello Stamping Friends,

Hope you had a great weekend.  All I need to know is, why in the world does the time go so quickly on the weekend but during the week, it often drags on?  If you can find the answer to this profound questions, please let me in on the secret.

Today's card is one made with a Sale-a-bration set that I just NEEDED to have. I absolutely feel in love with the phone booth, ferris wheel, and old fashioned bike (I know it has a name, I just don't know it, lol)  I know many of today's youth will have no idea what the phone booth is and I think that is such a shame.  Technology put these guys out of business.

 
I couldn't wait to make a fun red phone booth card.  And now here it is. What do you think? I even colored it in and those of you who know me pretty well, know just how I feel about coloring. I dislike it and I'm not afraid to admit it. I'd much rather cut out (yes, with scissors, not big shot and dies) 100 flowers than color 100 flowers.
 
I love the feel the newsprint paper gives this cards. Definitely screams nostalgia to me.  And what better to pair the phone booth with but the little hello stamp from the Pretty Petites sale-a-bration set.  I stamped the hello and then punched it out with the 1/2" circle punch.  Gives it a totally different look, right?  I think that's one of the most awesome things about using punches.
 
Stamping Supplies Used:
Stamps: Feeling Sentimental & Petite Pairs
Ink: Black Staz-on, Real Red Classic Ink
Paper: Very Vanilla, Real Red, Basic Black, First Edition Specialty Paper
Accessories: Dimensionals (that goes without saying, right?), 3/4" circle punch, 1/2" circle punch, aqua painter
 

Saturday, February 16, 2013

My Special Valentine

Hello Stamping Friends,

I told you I'd be back today with a special Valentine that I received.  I think you will completely understand and agree after I share with you.

 
Isn't it awesome?  Can you guess who made it?  My little man, Jonah (my youngest son) created this card all by himself. Here's some background on the card. Jonah for two days (Wednesday and Thursday) kept telling me he didn't get me anything for Valentine's Day and he didn't make a card for me. I told him he didn't need to get me anything, I had him and that was enough. Well, that obviously wasn't enough for him. When we went to get Noah's girlfriend's flowers, he asked how much money he had left from his birthday because he wanted to get something. I asked what he could possibly want with his money at the grocery store and he just got upset.  We left the store with Noah's gifts and Jonah was very upset to the point he had tears in his eyes.  I asked what was wrong and he said he didn't know what to get with his money.  I told him that he was a very lucky little boy that he had everything he wanted and didn't know what to spend the rest of his money on.  Little did I know what was going through his little mind.
 
Well, I thought that was all over when Thursday rolled around, but I was desperately wrong. He was still bothered when he came home from school with all his Valentine's from his friends and then received the little Valentine gift from Mommy and Daddy. Again, he told me he didn't get me anything. I said I didn't need anything but him. Don and I went to dinner, came home and Jonah was still upset that he didn't get me anything or make me a Valentine.  I told him (mind you it was bedtime at this point) to go in the stamp room and go make me something with whatever he wanted to use. 
 
 He went into the stamp room and got busy. The only thing he asked me for was a valentine's stamp.  After I got the stamp for him he got creative.  This card was made completely by him. I was downstairs while he created.  He came down and again asked about his birthday money.  I gave him his money. He wasn't happy with what I gave him.  He told me he wanted two dollars.  So I had some rearranging between my money and his money so I could just give him the two dollars he requested.  He then put the $2 into the card and handed it to me.
 
 
Here's the inside of the card. 
 It says:  Thanks for being a good, great Mom. Thank for getting me stuff for Valentine's and holiday. Keep the two dollars.  To, Mom   from, Jonah
 
Isn't it a wonderful Valentine?  It simply melted my heart and brought tears to this Mommy's eyes.  Of course, he got a big hug from Mommy and I again told him that he was the best Valentine I could have gotten because he was such a good, caring, kind, smart little boy and I am so proud of him.
 
 
Here's my little Valentine this past weekend at the Crystal Cabin Fever ice festival.
 
I think he did a wonderful job creating this beauty all by himself.  I will be sure to keep it for a very long time.  Thank you for letting me share my Valentine with you.


Friday, February 15, 2013

Trash or Treasure?

Hello Stamping Friends,
 
Hope you are having a wonderful day.  The sun is shining here and that makes for a very cheerful, happy day (yes, it's still cold but I can enjoy the sunshine from inside my home).  Welcome to another Fabulous Friday with the Sisters in Stamping.  This week our focus was on any of the accessories and designer series paper in the Spring Catalog.  What a fun challenge I say.  I have been saving soup/vegetable cans for a bit because I have wanted to cover them and make them pretty. I was also thinking I needed a nice little container for pens for my workshops.  And by golly, I think I did it.  I'm loving the way this little project turned out. 
 
 
Here it is all prettied up. From trash to treasure, right? Who wouldn't want to use a pen from this awesome little pen holder?  It's so easy to cover, you're going to start covering them to have all over the place. I think it would also be a great way to package up a little gift.  Kind of a gift in a gift.
 
Here's a close-up of the flowers and greeting on the can.  So what do you think?  Going to head in the kitchen, empty some cans, and start redecorating? That's what I thought. (smile)
 
Stamping Supplies Used:
Stamps: Oh, Hello
Ink: Lucky Limeade
Paper: Whisper White Cardstock & Tea for Two Designer Series Paper
Accessories: Artisan Kit, Sticky Strip, Paper Snips
 
Be sure you head over to the Sisters in Stamping blog for more ideas using the designer paper and accessories from the Spring catalog.
 
Also, tomorrow I'm sharing with you the sweetest Valentine I have ever received and the story to go with it. So you better come back to check it out, you won't want to miss it. I promise you it's going to warm your heart.


Thursday, February 14, 2013

Happy Valentine's Day!

Hello Stamping Friends,

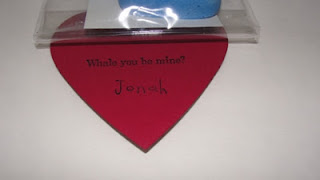
Happy Valentine's Day! I hope you are definitely telling those you love that you love them a little more today. Although you should tell them all the time and not just on Valentine's Day.  I told you I would share Jonah's valentine's with you a while back and here they are. Ready for your viewing pleasure.

 
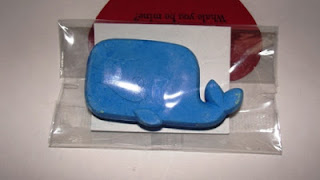
They are the perfect valentine's for a little boy named Jonah.  I mean, really, Jonah and the whale.  I found whale chalk on clearance at Walmart right around the time that the Oh, Whale set came out.  How perfect is that?  I know, it's perfect!

 
These were a team effort between Jonah and I. I decided to use the heart framelits and he picked the colors.  We even worked together cutting, stamping, dazzling detailing and packing the bags. Yes, 24 valentine's all made last night with some time to even spare.

 
A little blurry, but here's one of the individual ones.


Here's the back side of the hearts. Jonah hates writing his name over and over so a few years ago we bought a personalized stamp with his name. Quick and easy, guess I trained him pretty well too.

 
Just a quick picture of the chalk for you. Behind the chalk we put some sparkly smile face stickers.


And here's his teacher's gift. A heart shaped bowl filled with blue and silver Hershey kisses. I love how her gift matched the valentine's. Perfect, isn't it?

 
Just another view of the bowl of chocolates. Can never get too many pictures of chocolate in my opinion.
 
Stamping Supplies Used:
Stamps: Oh Whale & a personalized name stamp
Ink: Baja Breeze, Midnight Muse & Raspberry Ripple
Cardstock: Midnight Muse, Raspberry Ripple, Whisper White
Accessories: Big Shot, Heart Framelits, Paper Snips, Dimensionals, Dazzling Details, Cello Bag, Googly eyes (retired)
 
Happy Valentine's Day!

See you tomorrow for Fabulous Friday with Sisters in Stamping.
 

Friday, February 8, 2013

We are Crossing Borders Today

Hello Stamping Friends,

How are you?  Ready to cross the borders?  This week at Sisters in Stamping we are showing you projects using the Simply Scored Borders plate that is in the Spring Catalog.  It is packed full of all kinds of great borders/elements to add to your finished stamping project, dots, wavy lines, jagged lines and more.

I decided to make some "waves" with the plate today.  I simply love the Oh, Whale set. I know, it's 'cause I have a Jonah but seriously, isn't it adorable?  Wait, that's what we say about my Jonah. I do see a direct coorelation here. Sorry, but it's true (all of it). Anyway, I hope you like the card.


I used the Simply scored plate to make waves on the pool party cardstock before I cut it with the labels framelits. I know it's not easy to see with the full view of the card and that's why I took a close-up of the main image for you below.


See the whales swimming in the waves?  The simply scored borders plate is so neat. I see using it in so many different ways.  The other sisters have some neat ideas too, check out the Sisters in Stamping blog to see their ideas.

Stamping Supplies Used:
Stamps: Oh, Whale
Ink: Pool Party, Island Indigo, & Lucky Limeade
Cardstock: Lucky Limeade, Whisper White, Pool Party & Sunshine & Smiles Designer Series Paper
Accessories: Simply Scored, Simply Scored Borders Plate, Dimensionals, Adhesive, Googly Eyes (retired), Paper Snips, Big Shot, Labels Framelits, Whale Sizzlit, Cloudy Day Embossing Folder

Sunday, February 3, 2013

Time for a Creative Trip

Hello Stamping Friends,

Stampin’ Up is sending us another stamp set!


The Sent with Love Stamp Set and Sent with Love Designer Series Paper are only available during this limited time.

After April 30, they’ll both fly away!

You will need to download the official flyer HERE to see the stamp set!

In addition, you may purchase the Sent with Love Digital Kit (item 132914; $9.95).

*Please note that the digital kit is not included in the bundle.

Item                                Description                                                                       Price
131847                        Sent with Love Stamp Set (clear-mount; English only)           $17.95
132182                        Sent with Love Designer Series Paper                                  $10.95
132851                        Pretty Bundle                                                                       $25.50

Bundle Includes the Sent with Love Stamp Set, Sent with Love Designer Series Paper, and Calypso Coral Baker’s Twine (20% off retail value!)

Details:

You can purchase as many stamp sets, Designer Series Papers, or bundles as you’d like! There are no limits.

You don’t have to do anything special to take advantage of this special offer-shop away! Remember there is a 6.95 minimum shipping free under a $69.00 order, then it’s 10%. It’s SAB time, so you get a free gift with $50 order! Great time to get those ink pads and card stock you’ve been wanting

The Sent with Love Stamp Set, Sent with Love Designer Series Paper, and Calypso Coral Baker’s Twine are all available to be purchased separately. But why would you do that when you can buy all three together and save 20 percent?

The Sent with Love Stamp Set and Sent with Love Designer Series Paper are exclusive to this special offer-you won’t be able to get them after April 30!

Order online at http://www.rachelyurkanin.stampinup.net or call/email me to order anytime.

Happy Travels!

Saturday, February 2, 2013

February Best of Stamp Set of the Month

Hello Stamping Friends,

Time for another stamp set of the month. And this month, thanks to Valentine's Day, it's all about love.

As part of our 25-year anniversary celebration, we’re bringing back some of our favorite stamp images from the last quarter century and combining them into 12 sets, which will release-one set per month-during 2013.


Even better, along with some great classic images, each “Best of” set will also include a never-before-seen image! Here is the February Stamp Set of the Month called Best of Love! It’s only $14.94 (clear mount item # 132987)


I think my favorite of this set is Read my Lips.  I think I can use that in so many situations. What do you think? LOL

As a special incentive to collect the Best of stamps, we’re including a collector’s card and 25-year proof of purchase sticker with every Best of set.

In case you missed seeing January’s stamp set, here it is! It’s called Best of Birthdays. It is also $14.95 (clear mount item # 132929). You can get all of the Stamps of the Month until March 2014!


Collect six stickers, and send it in to redeem a FREE set of your choice valued up to $14.95! Free sets must be redeemed no later than April 30, 2014.