Showing posts with label holiday mini catalog. Show all posts

Friday, October 18, 2013

Undefined............

Hello Stamping Friends,

That's right, undefined is the topic of discussion today. Yes, it's Fabulous Friday with the Sisters in Stampin. Yes, we do have a theme today. It is the new Undefined, stamp carving kit.  Let me tell you, I thought it was pretty cool when they announced it at convention back in July. I ordered mine as soon as I could and then it just sat there. Oh, I would often ponder what I wanted to have a stamp of, but the simple thought of me having to draw and then carve a stamp scared me right away.

Let's be honest with each other. I stamp for a reason......I'm no artist. I can't draw. Won't catch me playing Pictionary. Well, that is because my mom laughed so hard at a sea horse I drew while playing a game of Pictionary with her and a couple of her friends as a teenager. She laughed so hard that she had tears in her eyes.  Needless to say, I ended up with tears in my eyes but not for the same reason as hers.  Don't get me wrong she wasn't being mean but I was super sensitive. I really don't think it was that bad, the big thing for her was that I drew the tail curling in the front. Which you will often see, so she was obviously mistaken.  Unfortunately for me, Mom is gone but the seahorse episode lives on. My sister often will buy me a seahorse item as a remembrance.

Now back to why you are really here, to see some stamped projects.  Okay, after taking a deep breath and deciding that I wanted a scarecrow stamp (there are none currently available) I went searching the internet for a picture of one that wasn't going to be too hard for me to look at and draw something similar myself. Here's the picture I used for inspiration.


Not too bad, right?  Well I decided, I didn't want to have the crow on mine. Honestly, it was because I wanted to keep my first carving experience as simple as possible. Why add more to it? So I started by drawing it onto a scrap piece of computer paper.  See the drawing on the right?  I then transferred it to the rubber and carved it out. The wood block on the left is how it looks stamped. So, how did I do?
   Here you have it stamped in navy on paper as well as what the rubber image looks like after I carved it.

 
And now the moment you have been waiting for. What does it look like on a card?  Well here it is. I love, love, love how it turned out. It's really fun to carve your own stamps. Now the problem for me is to decide what other images I NEED to have. That's the real problem. Overthinking!


 Here's a close-up of just the image so you can see it better. I just used the Stampin' Write markers to color the stamp and then stamped it onto whisper white cardstock.  For the tie on around the neck, I used pieces of the burlap ribbon that I frayed and glued them on with Tombo Multi-purpose adhesive.  I used a few of the spare pieces over the piece of burlap ribbon that is coming out from under the right hand side of the stamped image.  I then cut the frayed ribbon in half and attached one piece to the top of the stamped image and the other piece to the bottom.

Don't forget to head over to Sisters in Stamping for more carved stamp projects.  And don't forget to order your own Undefined kit to start carving your own stamps. It's a whole lot of fun.

Stamping Supplies Used:
Stamps: Undefined Stamp Carving Kit
Ink: Stampin' Write Markers, Sahara Sand, Tangerine Tango, Crushed Curry, Wild Wasabi, Basic Black, Night of Navy
Paper: Whisper White, Early Espresso, Crushed Curry Cardstock & Sweater Weather Designer Series Paper
Accessories: Burlap Ribbon, Sticky Tape, Snail Adhesive, Dimensionals, Craft Scissors, Paper Snips

Friday, December 14, 2012

I'm Back!!!! And ready to share.

Hello Stamping Friends,

I'm baaaaacccccckkkkk.  Sorry for the delay in posting. I have been super busy around here. It's that time of year afterall. Plus I've been subbing just about everyday. But I'm done with prepping for classes for the rest of the year (yes, I know that's only 2 weeks, but let me believe it's longer with saying that, lol)

I have a lot to share with you over the next week, so be sure to come back and check out what I have everyday. Today is Fabulous Friday at Sisters in Stamping. Our theme this week is ornaments. 

 
I shared a similar ornament last week for the 12 weeks of Christmas. (Check out last week's post to purchase the tutorial, it also has a second ornament included) This uses a different piece of designer paper from the Be of Good Cheer pack. I love how just changing the paper gives it a whole new look.  These ornament would be great to attach to the top of the gifts you are giving this season.  Then your lucky recipient can hang it on their tree for years to come.
 
Don't forget to check out the Sisters in Stamping blog for more ornament ideas. You are going to love them. And be sure to come back tomorrow. I have 3 ornaments to share with you that a few of the gals on my team made.
 

Monday, December 3, 2012

Snowy Season's Greetings

Hello Stamping Friends,
 
Today is the last of the three cards from last week's stamp a stash class.  Now that you saw the cards, don't you wish you attended that class?  I'm sorry you didn't but don't worry, there's another Christmas stamp a stash scheduled for December 13, so there's still time for you to get some Christmas cards made. And they will all be different from November's class.
 
 
This is certainly a snowy Season's Greetings. As mentioned previously, I love blues and purples together for snowflake cards and projects. So, of course, I needed to use my favorite wisteria wonder and pool party combo for this snowy card.  This is a quick and pretty easy (minus the cutting for those of you who don't like to cut) card to make multiples of. And even the cutting isn't that bad.  I love the jumbo pearl on the center of the snowflake. It's the perfect little touch.  I didn't add any dazzling details glitter to it but now that would be the really perfect finishing touch. Well, that's my opinion anyway.

Stamping Supplies Used:
Stamps: Curly Cute, Snowflake Soiree
Ink: Pool Party & Wisteria Wonder
Cardstock Pool Party, Wisteria Wonder & Whisper White
Accessories: Jumbo Basic Pearls, Dimensonals, Paper Snips, Snail Adhesive

Wednesday, November 28, 2012

Love Making Homemade Ornaments

Hello Stamping Friends,

Here in Northeast PA we are seeing some great (okay, not so great) winter weather. We got a few inches of snow yesterday.  Guess it's time to get those darn, loud snow tires on my car.  Took one of my son's friends home from volleyball conditioning and go stuck in his driveway. He has a super long driveway (probably 1/2 - 3/4 mile) and there is a hill just before the house and yep, I couldn't get up it. That pretty much tells me, it's time.  I put off getting them on as long as I can even though my Dad has been telling me for a month now to get them on. Suppose it's time to call Dad and ask him to take it. Maybe I can wait until December 1st, we're not expecting any more snow this week. (Yep, the ultimate procrastinator in snow tire dept).

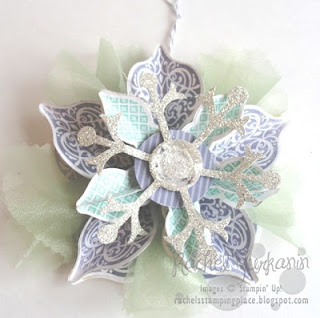
Anyway, enough about that. Here's an ornament I made using the ornament on the front of the Holiday catalog as inspiration.  I decided I DID NOT want to make one in the traditional red and green Christmas colors. I went with my favorite snowflake colors, blue and purple.  I used Pool Party & Wisteria Wonder.  What do you think?

 
I also changed it up from the one on the front of the catalog by adding a glimmering snowflake to the center, instead of a lolli. I love, love, love the cool colors (I don't not love, love, love the cool weather though, please don't make that mistake, lol) I love making ornaments though.  I have been holding an ornament exchange party at my home for about 15 years.  Everyone needs to make homemade ornaments and they bring one for everyone and they in return get one of everyone's. It's so much fun. So, of course, I needed to make one of these beauties. That and a whole group of people kept asking me to make them at their club gathering.
 
 
Here's a little closer view of the ornament. I must admit these ornaments are very time consuming to make. They are difficult just take a lot of time.  I wouldn't make a 100 of them.  Maybe 25, haha.
 
Stamping Supplies Used:
Stamps: Ornament Keepsakes
Ink: Wisteria Wonder, Pool Party
Cardstock: Whisper White, Silver Glimmer Paper, Pool party, 2011-2013 In-Color Paper Stack
Accessories: 2 1/2" circle punch, 1 3/4" circle punch, 1 3/8" circle punch, Big Shot, Holiday Ornament Framelits, Snow Flurry die, snail adhesive, multipurpose adhesive glue, silicone craft sheet, wisteria wonder baker's twine
Non-Stampin' Up items: hot glue gun, glue sticks, tulle netting


Tuesday, November 27, 2012

Everyone Needs a Christmas Planner

Hello Stamping Friends,
 
Do you have that one place where you can keep all your Christmas planning information?  If not, then you need one of these Christmas planners.  Or you need to make several to give as gifts this Holiday Season.  They are so easy to create that you can even personalize them by making them each a little different to suit the recipient perfectly.
 
 
This is one of the quick and easy Christmas gifts we made at my class earlier this month.  How do you make it you ask?  Very easily, it's just a black and white marble composition notebook covered and some tabs added.  See told you it was easy.  I used this year's Be of Good Cheer Designer Series Paper as my starting point to pick colors and layout.  I covered the notebook first with solid colored cardstock and then layered with designer paper. You definitely need to use sticky strip to hold it together. I think that's the part everyone hated at the class.  You can embellish the front any way you would like.
 
For the tabs you count every 25 pages (this notebook had 100 pages), put a piece of cardstock (cut to size) on the front sheet of the set of 25 pages, then punch a decroative label punch in coordinating cardstock. Fold it in half and attach to the page. I used the small oval punch to add more dimension to the tag. Here's some ideas for each section: recipes, family traditions, gifts, christmas card list (sent and received).
 
Stamping Supplies Used:
Stamps: Open Sleigh
Ink: Gumball Green & Cherry Cobbler
Cardstock: Gumball Green, Cherry Cobbler, Very Vanilla & Be of Good Cheer Designer Series Paper
Accessories: Sticky Strip, Snail Adhesive, Decorative Label Punch, Small Oval Punch, Paper Snips, Dimensionals,Gumball Green Sweater Trim Ribbon, and  Snow Festival Designer Printed Tags


Wednesday, November 21, 2012

Some Great Gift Ideas

Hello Stamping Friends,

The sharing continues......  

And all I have to say is I love these great little gift ideas shared by Patty J. at our November Yurinkin' Stamp Addicts get together. These are great for giving to co-workers, neighbors and friends to let them know you are thinking of them during this Holiday season without breaking the bank. And the recipient will be so happy that you thought of them and took the time to make them a special treat.

 
A little reindeer food for all those "little people" in your life to spread on their sidewalks to guide Rudolph to their house. Isn't the punched Rudolph so cute?  The top note die is a perfect bag topper too.

 
Kids too "old" for reindeer food?  How 'bout a Rudolph chocolate bar?  Again the punches make this a very easy treat to duplicate.

 
Outdoor lovers will love this treat of bird seed so they can watch their favorite birds all winter long. Again, the punches and the pre-printed tags from the Holiday catalog make this easy to duplicate and make multiples of.

 
Just wanted to show you the full thing.

 
And maybe my favorite is this little turkey with super long legs (licorice in 1x6 cello bags) made from punches.
 
Hope you have been inspired to make a treat or two this Holiday season to let your friends, family, neighbors and co-workers know you are thinking of them.


Monday, November 19, 2012

More Team Sharing

Hello Stamping friends,

I'm still on the sharing kick.  I'm telling you, my team did such a wonderful job sharing their talents at our November meeting and I can't help but share with all of you. And to top it all off, I still have two more days of sharing left. Hope you are loving it as much as I am.  Today's creativity is brought to you by Patti H.

 
Here she used the Winter Memories stamp set from the Holiday catalog to make a traditional color Christmas card.  She sponged the edges of her pieces to make it all come together nicely.

 
And then she made a magnetic bookmark with a fall theme using the two tags die and the big shot.

 
Here's the inside of the bookmark. Yes, you need a magnet on both sides. When you are die cutting this tag for the book mark remember to place your folded cardstock just under the cutting part of the die so you end up with one piece and not two.  I love these bookmarks. They are so fun to make for any season or occasion.
 
Patti H. thanks for sharing with us.

Sunday, November 18, 2012

Chilly? How 'bout some Hot Cocoa?

Hello Stamping Friends,

It's that time of year when it's a bit chilly outside and maybe that chill stays with you while inside like it usually does for me.  So today's post is a perfect compliment to chilly weather.  I little hot cocoa treat to give to all your friends and co-workers this upcoming holiday season.

These were made by Maria P. A member of my Yurinkin' Stamp Addicts team.  I love them and think the mug from Scentsational Seasons is perfect to finish each one off.

 
This is the outside of the holder. Do you  know what it is made from by looking at this picture?

 
That's right, it's a white lunch bag.  Makes a perfect card and gift holder all in one. Sweet, huh?


And here's another version using a brown lunch bag and brown tones.  I like both of them. Can't really pick a favorite.  I think it would simply depend on my mood which one I would prefer.
 
Thanks again Maria for sharing your talents with all of us.  I really appreciate it. I hope all of my followers are inspired as much from my team as I am.
 

Saturday, November 17, 2012

Christmas is Definitely in the Air

Hello Stamping Friends,

Told you I'd be back with more. Just had to take a break from Christmas cards for Fabulous Friday and this week's 12 Weeks of Christmas tutorial. By the way, aren't you just loving this year's 12 weeks of Christmas.  Each week the projects are so different from the last. Hope you are enjoying them as much as Debbie and I are enjoying creating them for you.

As promised, back with more Christmas card creations from Mary Lee M.  I love how different each one of her cards are. She really did a fabulous job.

 
A great, simple Christmas card. Who doesn't love adorable looking gingerbread.  This card would be so easy to make multiples of in a short amount of time.

 
Another great card to make multiples of. The triple time stamping offers a lot of bang for little work. During the busy holiday season, that's always a bonus.

 
And a very glittery tree to send your Christmas wishes. The snow burst folder is retired but you can easily change that out to another folder and still get the same wow effect.

 
What a great way to use your scraps.  Make a tree from strips of designer paper. All four of the cards Mary Lee made would be great to make in a hurry, if you waited to the last minute to even think about your Christmas cards.

I'll have even more Christmas ideas coming your way in the next few days from other Yurinkin' team members. Be sure to come back for more.
 

Wednesday, November 14, 2012

More Christmas Inspiration from My Team

Hello Stamping Friends,

I'm back with more great stamping inspiration for Christmas from my team.  All of today's cards were made by Mary Lee M.  I love when my team shares their creativity with other team members at our monthly gatherings. We all learn from each other.

Mary Lee's three cards today are all so different and that's another reason I love Stampin' Up!  They give us so many styles to choose from so our projects can stand apart from each other.

 
Such a pretty, elegant card using some products from the Holiday Catalog, Winter Wishes stamp set and the Holiday Frame.

 
And who doesn't love snowflakes (well in December anyway, come talk to me about them in February and I'll have a completely different view point, lol). This card would also be great for any winter occasion, not just Christmas.

 
And some gingerbread and hot cocoa to finish today off. This is such a fun card. Mary Lee, thanks for sharing your talents with us.  Come back Saturday for a few more Christmas card ideas from Mary Lee. Plus I have a few more days worth of posts for you from other team members. There was a lot of sharing at this month's team meeting.
 
Don't you want to be a part of the team? Join us today for only $99 and you will receive $125 of products of your choice from the catalogs, all your business supplies needed to get started as well as one color collection of ink pads (a $49.95 value).
 

Tuesday, November 13, 2012

Swaps from my Team

Hello Stamping Friends,

Today I'm sharing with you some great swaps from my team members from our November team meeting.  Remember if you would like to come and see what being a demo is all about you are welcome to come to one meeting as a guest.  After that you need to become a member of the team.  We would love some new members too.  And with this month's special (FREE set of 10 ink pads when you join the Stampin' Up! family by Dec 16) it is certainly a great time to do so.  If you were thinking about it whether you want a discount on all your stamping supplies, make a little extra money or build a business it's the time to join. Contact me for more information, I'd love to meet over some coffee and answer any questions you may have.

Now onto the swaps.  This month's theme was anything Christmas.

 
MaryLee M. made the above card.  It is such a pretty card. And I honestly just noticed that she used the illuminate pad with the squiggle tree outline stamp over the green words.

 
Next we have Patti H.'s card. Her card reminds me how cozy the holidays can be when you are home with family.

 
Then we have Dianne S.'s card.  Kudos to Dianne for all the coloring she did. I was extremely impressed because we all know I wouldn't have colored all that.  (LOL)

 
Then we have Patty J's great little treat.  Who doesn't love chocolate? Oh, who cares who doesn't, I know I love it and that's all that matters. (Just kidding, but really I haven't met many people who don't like chocolate).  What a good way to give a little gift without breaking the bank.
 
Thanks ladies for coming to the meeting and swapping. I love when you share your talents with all of us.


Monday, November 12, 2012

Christmas is in the Air....

Hello Stamping Friends,

I'm sure if you like most people you have begun to think about Christmas. Whether you want to believe it or not, it will be here before you know it. I barely made a dent in anything Christmas. Only a few gifts bought and that's is all. Time to start thinking about baking, card making, gifts making, holiday parties, decorating and all things Christmas.  I love this time of year but I always say I'm going to be more prepared and start earlier next year. Some how, next year never comes just like tomorrow never comes.  I know one day I'll get it down pat, probably just not this year. So for now, I'll just share with you a Christmas card that I made for some classes last month, since I have no idea what I'll do for my card this year.

 
Today's card is a pretty easy card to duplicate and make multiples of.  It uses the fun new coredinations cardstock and tulle ribbon. The cardstock is great because you can emboss it with embossing folders and then sand the raised parts to show some white. It's very cool and fun to do.
 
The tree (Evergreen stamp set) is stamped first in gumball green and them the outline image is stamped with the illuminate pad.  It's such a pretty look because the pad just shimmers.
 
Stamping Supplies Used:
Stamps: Evergreen
Ink: Gumball green, Illuminate
Paper: Cherry Cobbler, gumball green, and very vanilla cardstock and gumball green and cherry cobbler core'dinations cardstock
Accessories: Cherry Cobbler tulle ribbon, very vanilla seam binding, big shot, lacy brocade embossing folder, sanding block, snail adhesive

Friday, November 9, 2012

A Glimmering Fab Friday

Hello Stamping Friends,

Thanks for stopping by for this week's Fabulous Friday with the Sisters in Stamping.  I love this week's theme, glimmer paper.  I love all things sparkly so this was certainly right up my alley.  I actually designed this card for my team meeting this week without realizing it was the theme for this week's Fab Friday. Don't worry, I was simply elated that it worked for today too.  I've been kind of busy these last few weeks between subbing at the school and workshops/classes that when I can get multiple uses from one project I'm simply elated.

 
Isn't it a pretty card?  I know it's simple but I think it's great.  Love the simplicity and the elegant look all at the same time.  It's a great Christmas card if you don't have a lot of time but want a beautiful card. The small pieces of glimmer paper add just enough pizzazz to dress this right up.

 
Here's a close up of the tree. The tree is overstamped with the Silent night word stamp that comes in the Evergreen set.  I actually used the platinum shimmer paint on the stamp. It's really hard to capture the beauty through the camera but trust me on this.

Stamping Supplies Used:
Stamps: Evergreen
Ink: Garden Green
Paper: Whisper White Cardstock and Silver Glimmer Paper
Accessories: Dimensionals, Snail Adhesive, Big Shot, Lacy Brocade Embossing folder, Platinum shimmer paint, sponge dauber, paper snips
 
Don't forget to check out the Sisters in Stamping blog for even more sparkle and shine from glimmer paper project.


Wednesday, October 24, 2012

Not so scary Scarecrow

Hello Stamping Friends,

Today I'm sharing with you a fun card everyone made at my October punch class.  Isn't he the cutest little scarecrow you've ever seen?  I love him.  And I just love how great the Orchard Harvest Designer Series Paper compliments the scarecrow. It's like it was made just perfectly for a scarecrow.

 
The layout of the card is simple but completes the overall look of the card completely. The main image with the punch art had a little too much white for my liking so I did some doodling around the edges with a black stamping write marker and I think it's the perfect touch to finish off the card.
 
Stamping Supplies Used:
Stamps: None
Ink: None
Paper: Crumb Cake, Whisper White, Summer Starfruit, Blushing Bride (retired), Pumpkin Pie, Cherry Cobbler, Soft Suede, & Orchard Harvest Designer Series Paper
Accessories: Snail Adhesive, Dimensionals, Ticket Duo Builder Punch, Decorative Label Punch, Word Window Punch, Boho Blossoms Punch, Bird Builder Punch, Black Stampin' Write Marker & White Gel Pen, Stamping Dimensionals